
Bathroom Floor Plywood: What UK Homeowners Need to Know
Discover the essential details UK homeowners need for choosing bathroom floor plywood that ensures durability and prevents delamination in wet areas.
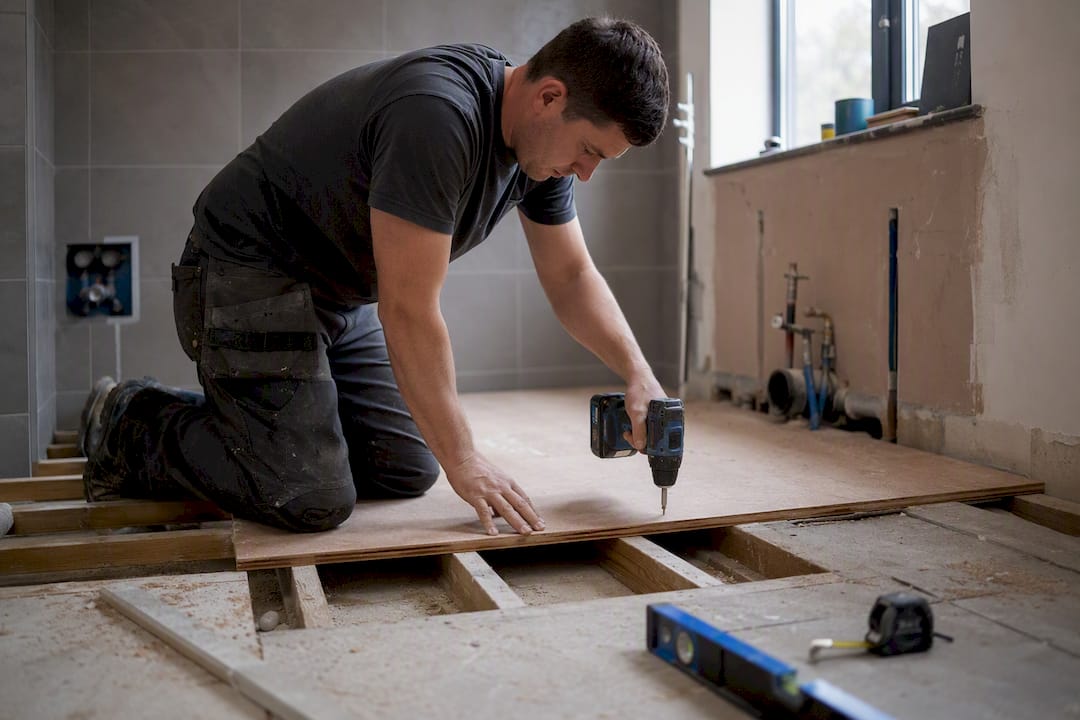
Use WBP (phenolic) bonded plywood meeting EN 314-2 Class 3 for your bathroom subfloor. Nothing else on the market matches its resistance to delamination in a wet room. As a thickness rule of thumb, fit plywood panels matched appropriately to joist spacing, with thicker panels used for wider joist centres.
- WBP (phenolic) glue — the specification, not the timber species, determines wet performance
- EN 314-2 Class 3 — the standard your supplier’s datasheet should reference by name
- Thickness should be matched to joist spacing and confirmed before ordering
Pro Tip: Ask to see the panel stamp or the supplier’s datasheet before it leaves the yard. If it says “MR” or just “exterior grade” with no glue class listed, send it back. That single check, done by JM Plumbing Services Ltd on every job, is what stops a bathroom floor failing eighteen months after the tiler leaves.
Key Takeaways
The single most important spec for a UK bathroom subfloor is WBP (phenolic) bonded plywood meeting EN 314-2 Class 3, matched to joist spacing and paired with a continuous waterproof membrane.
| Point | Details |
|---|---|
| Use WBP, not MR | Confirm EN 314-2 Class 3 on the panel stamp or datasheet before accepting delivery. |
| Match thickness to joists | Fit 15mm plywood at 400mm joist centres, 19mm at 600mm centres. |
| Plywood is structural, not waterproof | Add a continuous membrane and full perimeter tanking in every wet zone. |
| Match the build to the finish | Tiles need a backer board or second layer; LVT tolerates a single sealed layer. |
| Get the full system checked | JM Plumbing Services Ltd inspects joists and specifies the complete build-up on every bathroom project. |
Table of Contents
- Which Plywood Types Work for a UK Bathroom Floor?
- How Do You Specify Plywood for a Bathroom Subfloor?
- Why Does Plywood Need a Waterproof Membrane on Top?
- Installation Checklist: Avoiding the Most Common Failures
- Does Your Floor Finish Change the Plywood You Need?
- Where Can You Buy WBP and Phenolic Plywood in the UK?
- Can You Improve Moisture Resistance Beyond Standard WBP Plywood?
- How Do You Stop a Plywood Subfloor Lifting or Warping?
- How Do You Maintain a Plywood Subfloor Long Term?
- Why Experienced Installers Focus on the System, Not Just the Panel
- Get Your Bathroom Subfloor Specified and Fitted Right the First Time
- Sources
Which Plywood Types Work for a UK Bathroom Floor?
WBP plywood bonded to EN 314-2 Class 3 is the baseline for any bathroom subfloor or wall substrate in a damp zone. It resists the swelling and glue-line failure that ruins cheaper boards.
Phenolic film-faced plywood takes that same WBP bonding and adds a resin-coated face, typically available in thicknesses from 9mm to 24mm. The wipeable surface is genuinely useful under a vanity unit or around an airing cupboard shelf, but don’t be fooled into thinking the face finish is the reason it performs. The glue class underneath is doing the real work.
Marine plywood (BS 1088) occasionally gets specified for fully tanked wet rooms or commercial jobs, but for a standard domestic bathroom subfloor it’s usually overkill and unnecessary expense.
What to avoid entirely: MR-grade interior plywood and OSB. Both absorb moisture at the edges, swell, and delaminate under tile or vinyl in ways that are expensive to fix once flooring is down.
- WBP + EN 314-2 Class 3: the standard, use it
- Phenolic film-faced: good surface bonus, same glue requirement
- Marine BS 1088: justified only in fully wet rooms
- MR-grade and OSB: common causes of edge swelling and delamination, avoid
Pro Tip: Panel stamps carry the glue class in small print near the edge. If a supplier can’t produce a datasheet naming EN 314-2 Class 3 on request, treat that as a red flag, not an oversight.
How Do You Specify Plywood for a Bathroom Subfloor?
Specify WBP-bonded plywood with thickness appropriate to joist centres, typically thinner for closer joist spacing and thicker for wider spacing. Standard UK sheet format is 2440mm x 1220mm, so plan cuts around that before ordering.
For tiled floors, thickness alone often isn’t enough. Tiling over plywood demands extra deflection control, which usually means a secondary layer, either a second sheet of plywood staggered against the first or a cementitious tile backer board screwed on top. Vinyl and LVT finishes are more forgiving and can sit on a single well-fixed structural layer with the right membrane.
Fastener and edge notes:
- Screw at 150mm centres along supported edges and 300mm in the field, never nail
- Stagger sheet joints so they don’t line up across adjacent rows
- Seal every cut edge, especially around pipe penetrations and access panels, since raw edges absorb water fastest
Copy this checklist into your supplier email or installer brief:
- WBP bonded plywood, EN 314-2 Class 3
- Thickness matched to confirmed joist spacing
- Two-layer build for tiled finish, single layer plus membrane for LVT
- Sealed cut edges and stainless or coated screws throughout
Pro Tip: On delivery day, ask for the panel stamp and certificate, not just an invoice. On site, your installer should check joist deflection before laying a single sheet, since subfloor deflection is the most common root cause of tile and grout cracking, not the tile itself.
Why Does Plywood Need a Waterproof Membrane on Top?
Plywood is a structural substrate, not a waterproofing layer. No plywood panel is fully waterproof on its own, regardless of what a listing calls it. It has to be protected by a continuous membrane in every wet zone, with careful attention paid to the junctions where floor meets wall.
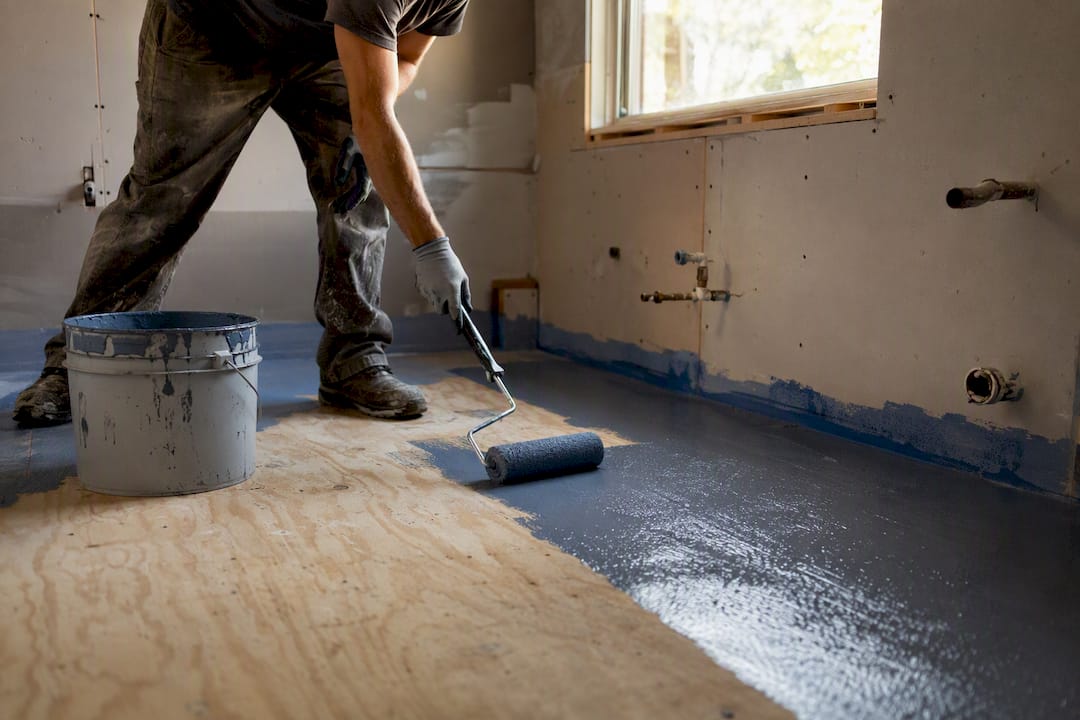
Your options are liquid-applied membranes, painted on and left to cure, or sheet membranes bonded across the whole floor. Either way, the membrane needs to run up the wall behind the shower or bath, a step called tanking, and lap correctly at every corner and pipe penetration. An uncoupling membrane sits between the plywood and the tile adhesive bed, absorbing minor movement so the tile grid above doesn’t crack.
Ventilation matters just as much as the membrane itself. A working extractor fan that actually vents outside, not into the loft space, cuts the long-term condensation load on your subfloor dramatically.
If you’re adding underfloor heating, check the manufacturer’s guidance on membrane compatibility before installation starts. Some heating mats need a specific bonding compound, and getting that wrong can trap moisture rather than release it.
Pro Tip: After tiling, press gently along the skirting line and around the bath panel. Any give or a hollow sound usually means the perimeter wasn’t tanked properly before the tiler moved in.
Installation Checklist: Avoiding the Most Common Failures
Start by checking the glue class stamp and panel condition the moment delivery arrives, before anyone touches a saw.
- Confirm joist condition and spacing, repairing any sagging or rotten timber first
- Lay panels with staggered joints across the full floor
- Fix with the correct screw pattern, never relying on adhesive alone
- Seal every cut edge, including around pipework
- Apply the waterproof membrane across the full wet zone, lapping at every seam
- Let adhesives and membranes cure fully before loading the floor
The mistakes that cause real damage tend to repeat across jobs: accepting MR-grade plywood because it’s cheaper, skipping edge sealing to save an afternoon, fixing panels to joists that already sag, or lapping a membrane the wrong way so water tracks under it rather than off it.
Watch for these before sign-off:
- Panels that flex noticeably underfoot
- Fixings that sit proud or feel loose
- Visible membrane laps that overlap the wrong direction
Tile failures rarely start with the tile itself; they start with a subfloor that wasn’t stiff enough or wasn’t waterproofed at the edges. Catching that at the checklist stage is far cheaper than catching it a year later.
Does Your Floor Finish Change the Plywood You Need?
Match the subfloor build to whatever finish is going on top. Tiles need the stiffest possible base, which usually means a cement backer board or a second plywood layer over your structural sheet. Vinyl and LVT tolerate a flatter, slightly more forgiving build, provided the membrane underneath is continuous.
| Consideration | Tiled finish | Vinyl/LVT finish |
|---|---|---|
| Wet-zone suitability | Needs full tanking behind fixtures | Needs continuous membrane, less tanking |
| Stiffness required | Highest, often two layers | Moderate, single WBP layer usually fine |
| Common UK thickness | 15 to 19mm plus backer or second layer | 15 to 18mm single layer |
For a genuine wet room, where the whole floor is a shower and there’s no tray, lean toward a fully tanked assembly and consider wet room-specific specification rather than adapting a standard bathroom build. A standard family bathroom with a shower over a bath rarely needs that level of upgrade.
Pro Tip: If your joists are already fixed at wider centres than you’d like, choosing LVT over tile is often the more practical route than adding a heavier structural layer to force a tiled finish. Compare flooring options before committing to either.
Where Can You Buy WBP and Phenolic Plywood in the UK?
Builders’ merchants stock general WBP plywood in standard sheet sizes, and that’s fine for most subfloor jobs. For phenolic film-faced panels or unusual thicknesses, a specialist plywood or tile-trade supplier is more reliable, since general merchants don’t always carry the film-faced range.
When ordering, use the exact phrases that get you the right panel: “WBP bonded plywood, EN 314-2 Class 3,” state your required thickness, and specify “phenolic-faced” if you want the resin-coated surface. Vague requests for “waterproof plywood” invite ambiguity, since some trade listings use that term loosely even on standard WBP stock.
On delivery, check:
- The panel stamp matches what you ordered
- No visible edge damage or delamination
- A batch datasheet or certificate is available on request
Pro Tip: Keep a copy of the datasheet with your renovation paperwork. If a floor problem shows up years later, that document proves what was actually installed.
Can You Improve Moisture Resistance Beyond Standard WBP Plywood?
WBP plywood handles moisture exposure well by design, but a few extra steps push that resistance further, particularly in a UK bathroom where humidity spikes every time someone runs a shower.
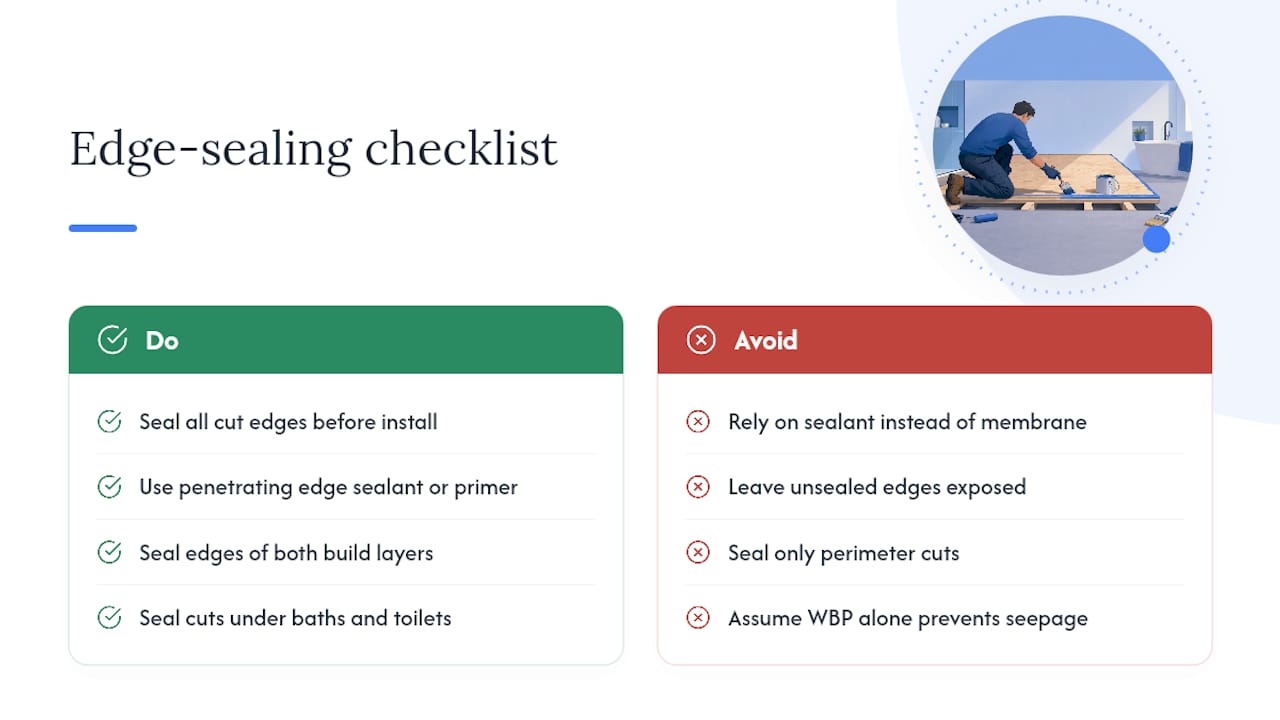
A penetrating sealant applied to cut edges before installation adds a second line of defense on top of the glue bond itself. Edges are always the weak point on any plywood panel, since that’s where the ply layers are most exposed to standing water or splashback. Even with WBP bonding, an unsealed edge left under a bath panel or behind a toilet pan can slowly absorb moisture over months.
Some installers apply a thin coat of exterior-grade wood primer or a proprietary edge sealant to every cut before the panel goes down, not just the perimeter of the room. It’s a small addition to the labor time and it closes off a failure point that’s easy to overlook once flooring covers everything up.
None of this replaces the waterproof membrane. Treatments and sealants are a supplementary layer of protection for the plywood itself, not a substitute for tanking or membrane work in wet zones. Think of it as protecting the panel from the moisture that inevitably gets past the finish over years of use, rather than trying to make an unprotected floor waterproof through the sealant alone.
If you’re specifying a two-layer build, sealing the edges of both layers, not just the top one, matters more than most homeowners realize. Moisture that reaches the lower layer through a gap or a poorly sealed penetration can sit there undetected for a long time.
How Do You Stop a Plywood Subfloor Lifting or Warping?
UK humidity swings more than most homeowners assume, and a plywood floor that isn’t installed correctly will telegraph that movement as lifting, cupping, or visible warping under the finish.
Acclimatizing the plywood before installation helps. Letting sheets sit in the bathroom itself for a day or two before fixing allows the panel to adjust to the room’s actual humidity level rather than arriving dry from a warehouse and expanding once installed. It’s a step that costs nothing but a delivery delay, and skipping it is one of the more common reasons floors move after the first winter.
Fixing pattern matters just as much as the fasteners themselves. Screws spaced too far apart let panels flex and eventually work loose, particularly at joints where two sheets meet. A tight, consistent screw pattern across the whole sheet, not just the edges, keeps the panel locked flat against the joists even as humidity shifts through the seasons.
Leave a small expansion gap, typically a couple of millimeters, between sheets and at the perimeter where the floor meets the wall. Plywood does move slightly with humidity even when it’s WBP bonded, and a floor laid tight edge to edge with zero clearance has nowhere to expand without buckling.
Finally, don’t rush the membrane and adhesive cure times. Loading a floor with tile adhesive or foot traffic before it’s fully cured is a common shortcut that leads to exactly the lifting problems a correct installation is meant to prevent.
How Do You Maintain a Plywood Subfloor Long Term?
A correctly specified and installed plywood subfloor should outlast the bathroom finish above it, but a few habits extend that lifespan further, especially in a high-moisture UK bathroom.
Keep the extractor fan running during and for a good stretch after every shower. This isn’t just about steam on the mirror. Reducing ambient humidity in the room protects the membrane and, by extension, the plywood underneath from the slow condensation buildup that happens in poorly ventilated bathrooms year after year.
Check silicone sealant around the bath, shower tray, and any floor penetrations annually. Cracked or peeling silicone is the single most common route for water to bypass the membrane and reach the plywood directly. It’s a five-minute check that catches problems long before they show up as a soft spot underfoot.
Watch for early warning signs: a slight give when you step near the shower or bath, a musty smell that wasn’t there before, or grout lines that seem to be opening up along the same section of floor repeatedly. Any of these point to moisture reaching the subfloor, and catching it early means a targeted repair rather than replacing the whole floor.
Avoid pressure-washing or flooding the bathroom floor during cleaning, even though the finish above looks waterproof. Standing water that sits for extended periods will eventually find its way to a membrane lap or a grout joint, and repeated soaking shortens the system’s working life regardless of how well it was installed.
Why Experienced Installers Focus on the System, Not Just the Panel
Getting the plywood spec right is necessary, but it’s not sufficient on its own. A perfect sheet of WBP plywood laid over a sagging joist, or sealed under a membrane that laps the wrong way, fails just as fast as cheap MR board. JM Plumbing Services Ltd inspects joists and specifies the full build-up on every bathroom job in Cardiff and the Vale of Glamorgan, because the panel is only one part of a system that has to work together for a decade or more.
Get Your Bathroom Subfloor Specified and Fitted Right the First Time
JM Plumbing Services Ltd handles the part most homeowners find hardest to check themselves: confirming the plywood spec, inspecting joists, and installing the membrane correctly before a single tile goes down. Instead of hoping your builder ordered the right panel, you get a written specification naming WBP bonded plywood to EN 314-2 Class 3, matched to your actual joist spacing and chosen finish.

We serve homeowners across Cardiff and the Vale of Glamorgan, from full bathroom renovations to targeted subfloor and waterproofing work ahead of a retile. If you’re planning a renovation and want the subfloor done properly from the start, book a site survey with JM Plumbing Services Ltd and get a written spec before any work begins.
Sources
These sources back the technical claims in this guide and are worth checking directly if you want a supplier datasheet or installation detail beyond what’s covered here.
- Best plywood for bathroom: Moisture-resistant grades, glue types & what to avoid - Kosmex Plywood
- Can You Tile Over Plywood in a Bathroom - FlooringClarity
- Bathroom subfloor solutions: materials, moisture barriers, and installation tips – Flooring Rating
- Phenolic film faced plywood product page - PLYSUPPLIER