
Dripping Shower Head? Diagnose and Fix in 5 Minutes, UK Homeowners
Run five minute checks to pinpoint a dripping shower head. Try cheap DIY fixes (most parts under $15), learn when to call a plumber, and get Cardiff-based...
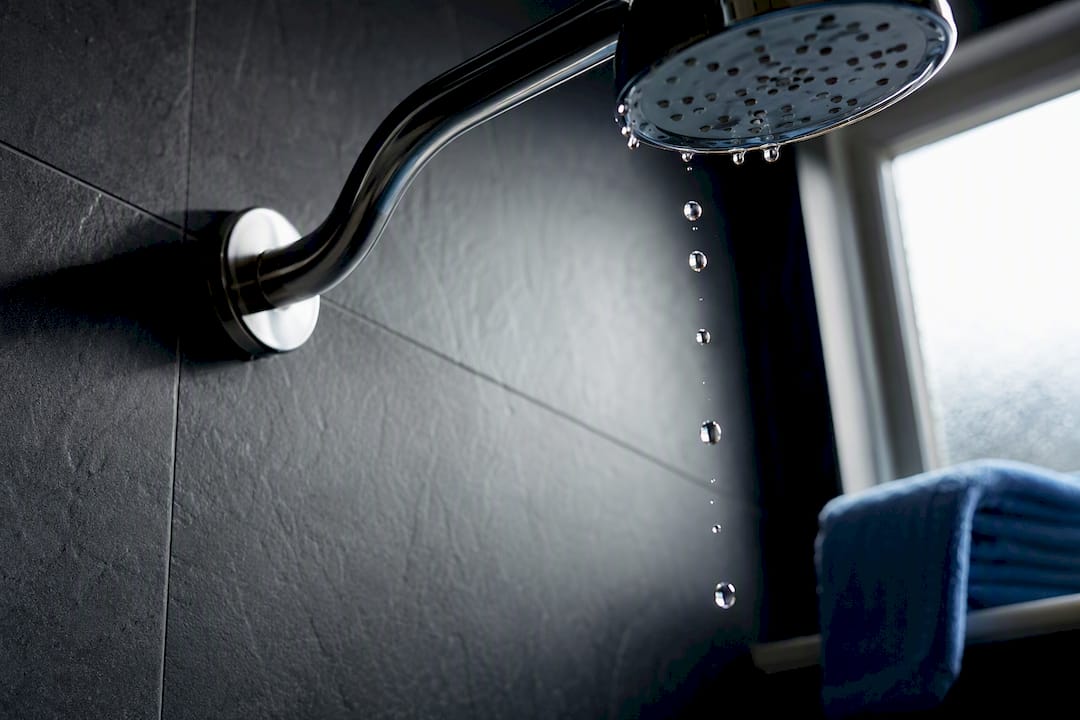
A dripping shower head usually comes down to four suspects: trapped water working its way out, a worn washer or O-ring, mineral buildup clogging the nozzle, or a failing valve cartridge. Press a tissue against the shower arm threads and time how long the drip lasts after shutoff. Stops within about 60 seconds? You’re likely looking at run-on water or a head issue. Keeps going for minutes or hours? Suspect the cartridge.
TL;DR:
- Most leaks caused by worn washers or mineral buildup can be fixed with inexpensive parts and simple cleaning within an hour.
- A drip that continues for more than a minute usually indicates a faulty valve cartridge or valve seat needing replacement.
- Detecting the source with quick tests like tissue contact and drip duration can prevent unnecessary disassembly or wrong parts purchase.
- Replacing a valve cartridge requires precise matching to the valve family and part number to avoid ongoing leaks and water waste.
- Call a professional if the leak symptoms include wall or ceiling damage, active leaks after repairs, or if the valve body shows corrosion.
Table of Contents
- How Do You Find Where a Shower Head Leak Is Coming From?
- How Do You Fix a Dripping Shower Head Yourself?
- When Is the Valve Cartridge the Real Problem?
- When Should You Call a Plumber Instead of Fixing It Yourself?
- How Do You Stop a Shower Head From Dripping Again?
- What Does JM Plumbing Services See on Real Repair Jobs?
- Need a Professional Fix Instead of a Weekend Project?
- Where This Guide’s Repair Steps Come From
- Sources
How Do You Find Where a Shower Head Leak Is Coming From?
Before touching a wrench, run three quick checks. They take less than five minutes combined and point you straight to the right repair instead of a guess.
- Tissue test at the threads. Turn the water on, then hold a dry tissue or paper towel against the joint where the shower arm meets the wall pipe. Wet tissue means a thread or connection leak, not a valve problem.
- Time the drip after shutoff. Turn the shower off completely and watch the head. A drip that quits inside a minute is almost always run-on water or a head issue. One that continues steadily points to the valve cartridge or a worn valve seat.
- Check the handle and escutcheon. Water seeping from behind the trim plate, or stains on the ceiling below a second-floor bathroom, signals an in-wall leak. That’s a job for a professional, not a Saturday afternoon project.
- Watch for stacked flow. If the shower keeps running water while the tub spout is also flowing, the diverter or rough-in valve is likely the culprit, not the head at all.
Each result narrows your next move considerably, which is the whole point of testing before you disassemble anything.
How Do You Fix a Dripping Shower Head Yourself?
Most dripping shower head problems get solved with parts that cost less than a takeout dinner. Here’s what you need and how to use it.
Tools and parts checklist:
- Adjustable wrench or pliers
- Soft cloth (to protect chrome finishes)
- Plumber’s tape (Teflon tape)
- Replacement rubber washers and O-rings
- White vinegar and an old toothbrush
- Silicone plumber’s grease
Wrap the cloth around the connection nut so the wrench doesn’t scratch the finish, then turn the head counterclockwise to remove it. Soak it in a bowl of white vinegar for 30 to 60 minutes. This loosens the mineral scale that clogs nozzles and, in many cases, clears the drip entirely. Scrub the holes with the toothbrush, rinse, and inspect the small rubber washer or O-ring inside the connector. If it’s cracked, flattened, or stiff, replace it. Hardware stores stock these by the diameter, so bring the old one or measure it before you buy.
For handheld hoses, do the same check at both hose ends. Once everything is clean and reassembled, strip any old tape from the arm threads and wrap on 3 to 4 clockwise wraps of fresh plumber’s tape, then hand tighten and finish with a quarter turn of the wrench. Most parts for this job run under $15 total.
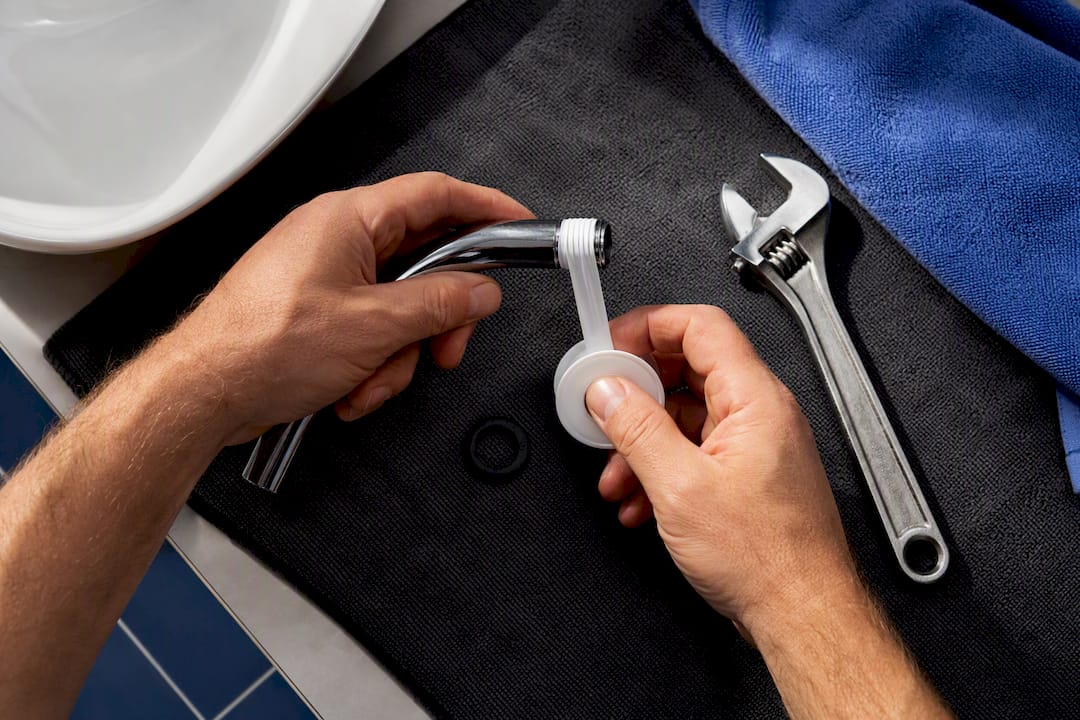
Pro Tip: Dab a thin layer of silicone plumber’s grease on the new washer before you reinstall it. It keeps the rubber supple longer and makes the next teardown a lot easier.
Run the shower for 90 seconds, then shut it off and watch. No drip means you’re done.
When Is the Valve Cartridge the Real Problem?
If the drip continues long after the handle is off, the valve cartridge is the most likely cause, not the head. Other tells: a leak seeping from around the escutcheon, or multiple fixtures on the same line acting strange.
Replacing a cartridge is a moderate DIY job if you’re comfortable with basic plumbing. The general sequence:
- Shut off water at the local stops or the main supply, then drain the line by opening the handle.
- Remove the handle and trim cover, exposing the retaining bonnet.
- Unscrew the bonnet nut and withdraw the cartridge with pliers or a cartridge puller.
- Inspect the seats and springs for wear, corrosion, or debris.
- Flush the valve body with water before installing anything new, since leftover grit is a common reason a fresh cartridge still leaks.
- Install the matching replacement cartridge or new seats and springs, then reassemble and test.
The step people botch most is buying the wrong part. Cartridges aren’t universal. You need the exact valve family and part number, since tab orientation and sizing differ between manufacturers even within the same brand’s product lines. Snap a photo of the old cartridge and the valve body before you go shopping.
A slow drip, one drop per second, can waste a significant amount of water over a year. That’s not a rounding error on a water bill, and it’s exactly why a “minor” cartridge drip deserves attention sooner rather than later.
DIY-appropriate: accessible shutoffs, a clean valve body, no visible corrosion. Call a plumber instead if the body is corroded, the shutoffs are missing or seized, or you spot moisture in the wall.
When Should You Call a Plumber Instead of Fixing It Yourself?
Some signs mean stop what you’re doing and pick up the phone. Others just mean proceed with caution.
- Dripping sounds behind the wall, or ceiling stains below the bathroom, point to a concealed leak that’s already causing hidden damage.
- Soft, crumbling, or discolored drywall near the shower valve means water has been sitting for a while.
- A new leak appearing after cartridge replacement, a corroded valve body, or an active leak visible behind the trim all call for a professional, not a second attempt.
A plumber checks the pressure regulator, the valve body itself, and the pipework hidden behind the wall. Simple call-outs for a cartridge swap or reseal are a modest cost. Extensive in-wall repair, involving cutting into tile or drywall, runs considerably higher. Either way, get a fixed quote before work starts.
How Do You Stop a Shower Head From Dripping Again?
Prevention here is mostly about not letting small wear turn into a repeat repair.
- Clean the shower head every three to four months in normal water conditions, and monthly if you’re in a hard-water area where scale builds up fast.
- Swap washers and O-rings proactively every year or two rather than waiting for a failure.
- Apply silicone plumber’s grease to new seals so they last longer under regular use.
- Check your water pressure with a hose-bib gauge. Pressure above roughly 80 psi accelerates wear on washers and cartridges alike.
- Keep a photo of your valve’s brand and model, plus the cartridge part number, in your phone so a future repair takes minutes, not an extra trip to the store.
Pro Tip: Write the cartridge part number on a piece of tape stuck inside the bathroom cabinet. You will forget it by the time you need it again.
What Does JM Plumbing Services See on Real Repair Jobs?
On the jobs we run across Cardiff and the Vale of Glamorgan, cartridge failures outnumber simple head issues by a wide margin once a shower is past the five year mark. Homeowners who try the tissue test and cleaning steps first usually solve it themselves when the cause is scale or a worn washer. When the drip persists after a cartridge swap, it’s almost always a wrong part or a valve body that needed replacing all along. If you’re also dealing with weak flow alongside the drip, our guide on low shower pressure covers that overlap, and anyone with staining on a ceiling below should read what to do about a shower leak through the ceiling before doing anything else.
— Cameron
Need a Professional Fix Instead of a Weekend Project?
Some drips are a ten-minute fix. Others are a sign your valve, pipework, or an aging bathroom needs more than a new washer. Jmplumbingservicesltd handles cartridge replacement, leak detection, and full bathroom repairs and renovations across Cardiff and the Vale of Glamorgan, with the tools to spot problems a tissue test can’t catch.

Book a call-out and a technician inspects the valve, diverter, and surrounding pipework, diagnoses the actual cause, and gives you a fixed-price quote before any work starts, backed by a warranty on the labor. If the leak has already reached a wall or ceiling, our bathroom leak guidance explains what to check while you wait. For anything beyond a simple repair, from a tired shower valve to a full retile, get a quote through our Cardiff bathroom installation page and have a plumber look at it properly.
Where This Guide’s Repair Steps Come From
Diagnostic timing and cartridge symptoms draw on Plumbing By The Book and Delta Faucet’s manufacturer guidance. Cleaning steps follow Wickes, and thread-sealing technique comes from HomeFixer101. For wet room or pan waterproofing questions, see SurfacesGalore’s shower pan guide.
Sources
- Why Is My Shower Dripping? 5 Common Causes 2026
- Here’s how to identify the source of the leak and put an end to those annoying drips. — Delta Faucet
- How to fix a dripping shower — Wickes
- How to Fix a Leaky Shower Head (Step-by-Step Guide), HomeFixer101