
12% Moisture Test Stops Repeat Peels: Fix Peeling Bathroom Paint, UK
Fix peeling bathroom paint in UK homes: run tape adhesion and a 12% moisture check, remove loose paint, prime correctly, or call a pro.
12% Moisture Test Stops Repeat Peels: Fix Peeling Bathroom Paint, UK
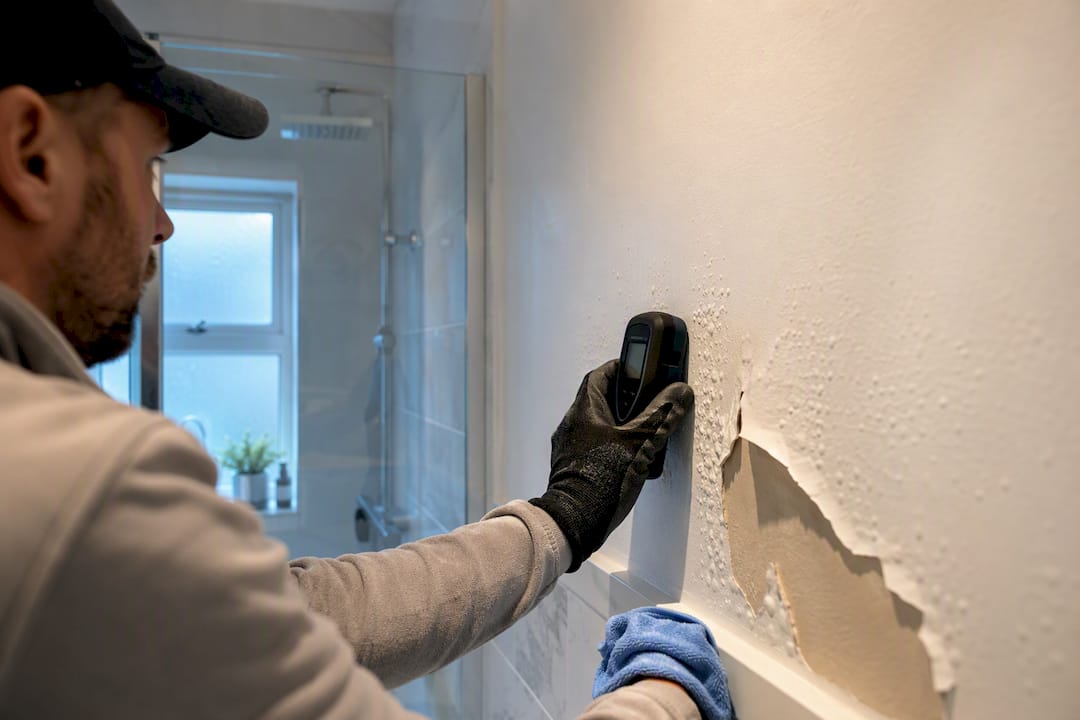
Peeling bathroom paint almost always means the paint has lost its bond with the wall, and the cause is usually moisture, not a bad paint job. Don’t paint over it. First, check for loose edges with a tape test; look for leaks or weak ventilation; then remove the failing paint, dry the wall out, prime correctly, and repaint with a bathroom-rated finish.
TL;DR:
- Peeling bathroom paint almost always results from moisture trapped behind the paint, caused by steam, leaks, or condensation from cold pipes.
- Performing a tape adhesion test and inspecting for mold, soft drywall, or recurring peel lines helps identify underlying issues before repair.
- Properly removing loose paint, thoroughly drying the wall, and applying a bathroom-rated primer and finish are essential steps to prevent re-peeling.
- Controlling moisture sources through adequate ventilation, sealing leaks, and using dehumidifiers are critical to stopping future paint failures.
- If paint continues to peel despite correct prep and ventilation, a professional should diagnose hidden leaks, drywall damage, or structural moisture problems.
Table of Contents
- Why Does Bathroom Paint Peel in the First Place?
- What Should You Do Right Now?
- How Do You Repair Peeling Paint Step by Step?
- How Do You Stop Bathroom Paint From Peeling Again?
- When Should You Call a Tradesperson Instead of DIY?
- What Tools, Primers, and Paints Actually Hold Up in a Bathroom?
- Tradesperson Perspective: The Three Things That Make Repairs Hold
- Get a Proper Fix, Not Another Repaint
- Sources
- FAQ
Why Does Bathroom Paint Peel in the First Place?
Bathrooms can spike from around 40% to high relative humidity during use, and that constant expansion and contraction is what breaks the bond between paint and wall according to government building guidance. Trapped moisture behind the paint film pushes it away from the substrate, and once that bond fails, no amount of touch-up painting fixes it.
Several things cause that moisture buildup:
- Steam and condensation from showers, especially without adequate extraction
- Hidden plumbing leaks inside walls or under the tub/shower tray
- Cold pipes sweating inside a wall cavity, which can saturate drywall from the inside without any visible leak
- The wrong primer or finish used on the original paint job
- Soap film, grease, or steam residue that stopped the last coat from ever bonding properly
Not every wall problem is the same kind of failure. Surfactant leaching, sometimes called “crying walls,” shows up as sticky streaks or tan drips that wipe off with a damp cloth. It’s a cosmetic moisture reaction, not adhesion failure, and usually clears up with a clean and a better-quality repaint. True peeling looks different: sheets or curls of paint you can lift with a fingernail.
To test which one you’re dealing with, press a strip of painter’s tape onto the suspect area, rub it down, then pull it off sharply. If paint comes with it, that section has failed and needs to come off entirely. If you own a moisture meter, a drywall reading above 12% means the substrate is still wet, and repainting now will just trap the moisture again. Watch, too, for soft or bubbling paper facing on the drywall, brown staining, or peel lines that keep reappearing at the same spot above a shower or around a window edge. That repeat pattern almost always points to a source you haven’t found yet.
What Should You Do Right Now?
Before you touch a scraper, contain the problem and gather information.
- Stop repainting over any area that’s flaking. Mark liftable sections with a pencil circle so you don’t miss any later.
- Check under the sink, behind the toilet, and around the tub or shower tray for active leaks, and shut off water if you find one.
- Run the extractor fan, crack a window, or set up a dehumidifier for a few days to pull moisture out of the room.
- Do a tape adhesion test across every suspect wall and ceiling section, not just the obvious spot.
- Note exactly where paint failed, how large the area is, and whether it’s near plumbing, an exterior wall, or a window.
- If you see mold covering more than about one square meter, or large soft, crumbling drywall, stop and get a professional opinion before doing further work yourself. If a leak seems to be behind the wall rather than an obvious drip, this guide to diagnosing a bathroom leak walks through what to check first.
How Do You Repair Peeling Paint Step by Step?
Once you know the extent of the damage and the moisture source is under control, the repair itself follows a fixed sequence. Skipping a step is exactly how peeling comes back in six months.
Before you start, gather a scraper or 5-in-1 tool, sandpaper in 80 and 120 grit, a shop vacuum, a mold cleaner or diluted bleach solution, rags, a moisture meter if you have one, a respirator mask, gloves, and eye protection.
- Scrape off every bit of loose paint. Work the scraper under the lifted edge and keep going until you hit paint that won’t budge. Painting over any remaining loose edge is the single most common reason repairs fail again within a year, according to decorating trade guidance.
- Feather the edges. Sand the transition between the bare patch and the surrounding sound paint with 80 grit, then smooth it with 120 grit so there’s no visible ridge once you repaint.
- Clean and treat. Degrease with a TSP substitute, then treat any mold with a dedicated mold cleaner or a diluted bleach solution. Rinse thoroughly and let the wall dry completely, ideally 24 hours minimum.
- Repair the substrate. Small dents get a lightweight filler. If the drywall paper is soft, bubbled, or separating from the gypsum core, that section needs cutting out and replacing rather than patched over.
- Prime correctly. Use a stain-blocking shellac primer like Zinsser B-I-N over old water stains, a bonding primer on chalky or glossy old paint, or a mold-killing primer where mildew was present. New plaster or bare drywall needs its own appropriate sealer first.
- Topcoat with a bathroom-rated paint. Choose an acrylic finish with mildewcide built in, in satin or semi-gloss. Two coats is standard. Avoid showering for 48 hours after the final coat, and hold off on heavy scrubbing or cleaning for 30 days while the film fully cures.
Pro Tip: Run a tape adhesion test on your primed surface before you commit to the topcoat. If the tape lifts anything, you’ve still got a moisture or prep problem, and it’s far cheaper to catch that now than after two coats of finish paint.
Peel Stop, a bridging sealer, and Perma-White, a scrubbable bathroom finish, are two products decorators use specifically for stabilizing failing edges and resisting mold in exactly this kind of repair.
How Do You Stop Bathroom Paint From Peeling Again?
A good repair only holds if you fix what caused the failure in the first place. Most of that comes down to moving moist air out of the room faster than it can condense on a cold surface.
- Size your extractor fan for the room and run it for 20 to 30 minutes after every shower, not just during it.
- Duct the fan straight to the outside, never into a loft or attic space, and confirm airflow with a simple tissue test held against the grille.
- Insulate cold exterior walls or exposed pipes if condensation keeps forming on them; a dehumidifier helps in the meantime.
- Wipe down splash zones near the shower and sink weekly so water doesn’t sit on the paint film.
- Re-caulk gaps where tile meets wall or tub meets tile once a year.
- Do a quick annual inspection for soft spots or new peel lines, especially around the shower enclosure.
If your fan seems weak or noisy, it’s worth checking whether the extractor fan itself needs repair before you assume ventilation alone will solve a recurring peel problem. For finish choice, a room-by-room guide to bathroom paint sheens is a useful reference when you’re deciding between satin and semi-gloss.
When Should You Call a Tradesperson Instead of DIY?
Some peeling problems aren’t paint problems at all. They’re plumbing or structural problems wearing a paint problem’s disguise.
- An active leak you can hear or see but can’t locate the source of
- Drywall that’s soft, crumbling, or separating from the wall when you press it
- Mold covering more than a small patch, or mold that keeps returning after cleaning
- Paint that keeps failing in the same spot even after correct prep and priming
A professional will pressure-test pipes, check for cavity moisture and condensation on cold surfaces, assess insulation, and replace drywall properly rather than patching over a compromised section. They can also rework ventilation ducting if that’s been the hidden culprit. If a shower or bath area is the recurring trouble spot, this breakdown of ceiling leaks from showers covers what a tradesperson typically finds and fixes in that scenario, and wet room leak diagnosis explains the process for wall-hidden moisture more broadly.
What Tools, Primers, and Paints Actually Hold Up in a Bathroom?
Buying the wrong primer or a matte wall paint is how a lot of otherwise careful repairs fail within a year anyway.
- Tools: a stiff scraper, 80 and 120 grit sandpaper, a shop vacuum, tack cloths, a respirator, and gloves.
- Primer for water stains: a stain-blocking shellac primer such as Zinsser B-I-N seals tannin and old water marks completely.
- Primer for chalky or glossy surfaces: a bonding primer gives the new coat something to grip.
- Primer for mold-affected areas: a mold-killing primer, applied only after the surface is fully clean and dry.
- Primer for bare new plaster: a proper plaster sealer or diluted PVA first, per the manufacturer’s datasheet.
- Topcoat: an acrylic paint with mildewcide built in, in satin or semi-gloss sheen. Matte finishes hold moisture and grime and are a poor choice for a shower wall.
- Before you buy anything, check the product datasheet for stated mildew resistance, recommended substrate, and drying time between coats.
Tradesperson Perspective: The Three Things That Make Repairs Hold
Most DIY repaints fail for the same three reasons: nobody found the actual moisture source, nobody stripped back to sound substrate, and nobody fixed the ventilation that let the problem happen in the first place. Get those three right, in that order, and the paint job is almost incidental. One habit separates a repair that lasts from one that doesn’t: measure the moisture before you prime. Patience beats speed every time on this job.
— James
Get a Proper Fix, Not Another Repaint
If you’ve been through the tape test and the drywall still feels soft, or the peeling keeps coming back in the same spot no matter how carefully you prep, the problem is behind the wall, not on it. Professional tradespeople diagnose hidden leaks, replace water-damaged drywall, and correct ventilation and ducting issues that cause repeat failures, work that a paint job alone can’t touch.

Hiring a professional pays off once you’re dealing with repeated failures, structural moisture, or mold spreading beyond a small patch, situations where another coat of paint just buys you a few more months before the same wall fails again. Professional contractors handle everything from a single leak diagnosis to a full bathroom renovation with correct waterproofing and ventilation built in from the start. If your bathroom keeps failing the tape test, book an inspection with Jmplumbingservicesltd and get a straight answer on what’s actually happening behind that wall.
Sources
- How to repair peeling paint (Homebuilding)
- Zinsser tackles mould and peeling paint on a bathroom ceiling
- How to paint bathroom walls: prep, primer, and the mistakes that bubble in a year — CompositePaint
FAQ
What should I do if my bathroom paint is peeling?
Stop painting over it, run a tape adhesion test to find every failed area, remove all loose paint down to sound substrate, let it dry fully, then prime and repaint with a bathroom-rated finish.
Does peeling paint in the bathroom mean I have mold?
Not necessarily. Peeling is usually an adhesion failure from trapped moisture, but if you see mold colonies or the drywall paper feels soft, that section likely needs to be replaced rather than just cleaned.
My bathroom ceiling paint is peeling. What can I do to fix it?
Ceiling peeling almost always means moisture is condensing overhead from steam or a fan that isn’t venting properly. Scrape back to sound paint, confirm the extractor fan is ducted outside and running long enough after showers, then prime with a stain-blocking or mold-killing primer before repainting.
Does peeling paint always mean there’s a damp problem?
Usually, yes, though the source varies. It can be steam and poor ventilation, a hidden plumbing leak, or cold pipes sweating inside a wall, and surfactant leaching can look similar but is a different, less serious issue.