
UK Contractor's Bathroom Renovation Checklist to Prevent Leaks
A UK contractor bathroom renovation checklist that prevents leaks and failed inspections. Covers budget splits, permit checks, waterproofing tests,...
UK Contractor’s Bathroom Renovation Checklist to Prevent Leaks

The bathroom renovation checklist that works is chronological: scope and budget first, then measurements and permits, then the sequence of demolition, rough-in, waterproofing, and finishes, ending with a punch list before final payment. Skip a step out of order and it usually costs you later, either in a failed inspection or a leak behind new tile. The first move, before you call anyone, is deciding what you’re actually changing and setting a hard budget ceiling to match it.
TL;DR:
- Proper sequencing of bathroom renovation steps prevents costly mistakes, with waterproofing and permitting checked before tiling and fixture installation.
- Setting a firm budget before obtaining quotes, including a 10-15% contingency, ensures accurate financial planning and avoids unexpected expenses.
- Accurate measurements, detailed documentation, and early order of long-lead items are crucial for precise quotes and on-time project completion.
- Confirming waterproofing, ventilation, and permit approvals during work reduces the risk of hidden water damage and regulatory issues.
- Using detailed, written contractor quotes and change-order procedures minimizes surprises when unforeseen problems like rot or outdated wiring are discovered.
Table of Contents
- Bathroom Renovation Checklist: The Order That Prevents Disasters
- How to Set a Realistic Budget and Rank Your Priorities
- Pre-Renovation Checks: Measure and Document Before Demolition Starts
- Which Bathroom Changes Trigger Building Regs Approval?
- Bathroom Remodel Timeline: What Happens When
- Vetting Contractors: What Every Quote and Contract Should Include
- Choosing Materials That Survive a Wet Room
- Waterproofing and Ventilation Checks While Work Is Underway
- Final Punch List and Job File Before You Pay the Last Invoice
- Waste Disposal and Demolition Planning
- A Contractor’s View on Where Bathroom Jobs Actually Go Wrong
- Let Jmplumbingservicesltd Handle the Checklist for You
- Where This Checklist Comes From
- Sources
- FAQ
Bathroom Renovation Checklist: The Order That Prevents Disasters
Print this and bring it to every contractor meeting. It’s the skeleton the rest of this guide fills in.
- Define scope: full remodel, wet room conversion, or partial refresh.
- Set an all-in budget with contingency built in.
- Measure the space and locate drains, soil stacks, and vents.
- Confirm which permits or building-regs approvals apply.
- Order long-lead items (vanities, shower glass, specialty tile).
- Get two or three written, itemized quotes.
- Schedule the work and lock milestone dates.
- Verify waterproofing at rough-in, before tile goes down.
- Pass required inspections before walls close up.
- Walk the final punch list before releasing final payment.
Pro Tip: Photograph every stage before it disappears behind tile or drywall. It’s the cheapest insurance you’ll ever buy on a renovation.
How to Set a Realistic Budget and Rank Your Priorities
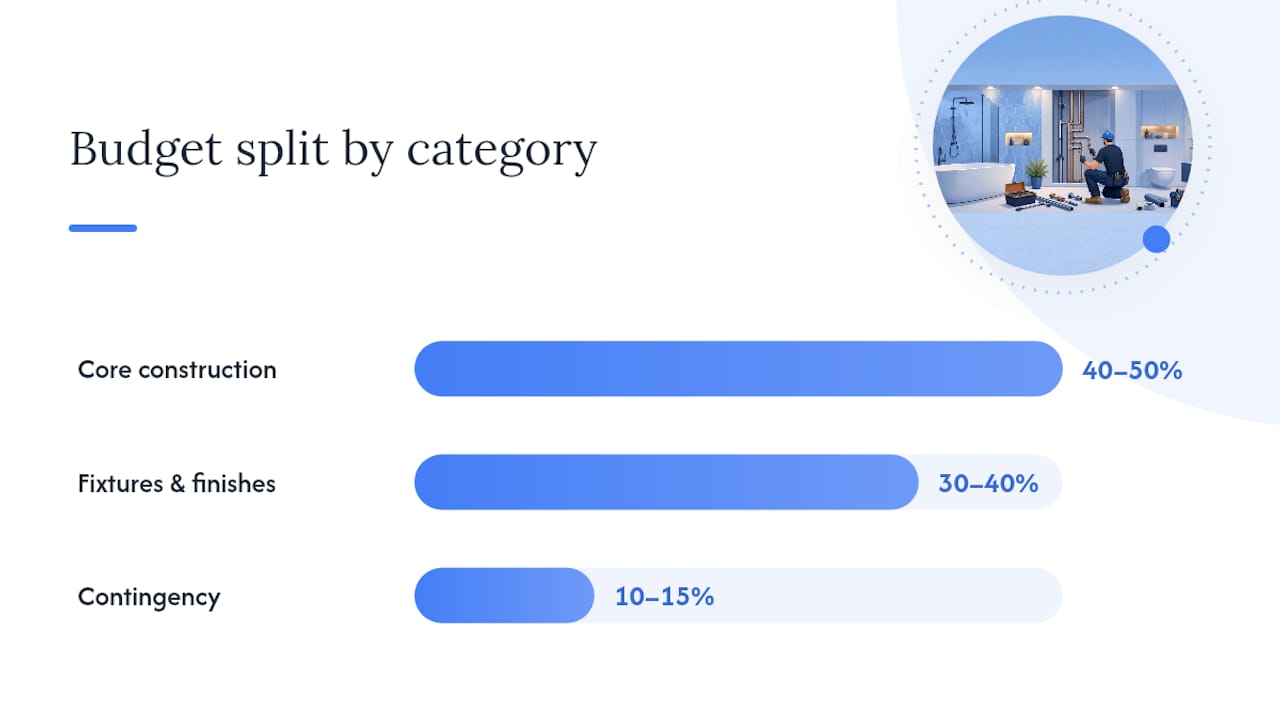
Set your all-in number before you talk to a single contractor, not after. Split it three ways: roughly 40 to 50 percent for core construction (plumbing moves, waterproofing, electrical), 30 to 40 percent for fixtures and finish materials, and a contingency of at least 10 to 15 percent for whatever the demolition uncovers. Bathrooms hide rot, old pipework, and undersized wiring behind their walls more often than any other room, and that’s exactly where inadequate planning turns into runaway costs, according to MyBuilder’s cost guide.
Before you rank anything, decide what’s non-negotiable versus what bends if bids come in high.
- Must-haves: safe electrics, working waterproofing, adequate ventilation, code-compliant drainage.
- Flexible: tile brand, vanity style, tap finish, lighting fixtures.
- Cut-first-if-tight: heated flooring, freestanding tubs, smart mirrors.
Financing a shortfall with a home improvement loan is common, but a bigger contingency up front almost always beats borrowing mid-project. For a fuller breakdown of where the money typically goes, our bathroom renovation cost guide walks through real UK budgets by project size.
Pre-Renovation Checks: Measure and Document Before Demolition Starts
Contractors quote accurately only when you hand them accurate information. Measure the room twice, note ceiling height, and mark where the existing drain, soil stack, and vent run, since moving any of them adds cost and often triggers approval requirements. Locate the water shutoff valve, run the taps, and check pressure. Weak pressure now means a plumbing issue that needs solving before new fixtures go in, not after.
- Take dated photos of any staining, soft flooring, or existing damage.
- Sketch a simple floor plan with rough dimensions and fixture positions.
- Note the location of the main water shutoff and any isolation valves.
- List existing electrical circuits and where the extractor fan currently vents.
Hand this pack to every bidder. It’s the difference between a quote based on guesswork and one based on your actual bathroom, and it’s a step our small bathroom layout guide covers in more depth if space is tight.
Which Bathroom Changes Trigger Building Regs Approval?
Moving a toilet’s drain line, altering a soil stack, rewiring circuits, or changing a room’s use (turning a bedroom into an en-suite, for instance) commonly requires building-regs approval or notification. The Gov is the reference point for confirming whether your specific changes need sign-off before work starts.
- Ask your contractor directly: who is pulling the permit, and when?
- Get a copy of the approval or notification before demolition begins, not after.
- Tie your final payment to the inspection sign-off, never to the visual finish alone.
- Confirm any new electrics near water sources include RCD (GFCI-equivalent) protection.
- Make sure the extractor fan vents outside, never into a loft space.
Our building regs breakdown covers which specific bathroom jobs usually need sign-off and which don’t.
Bathroom Remodel Timeline: What Happens When
A realistic order of works keeps trades from tripping over each other and keeps your project moving toward a real finish date.
- Demolition and strip-out (1 to 3 days).
- Rough-in plumbing and electrical (2 to 5 days).
- Waterproofing and membrane cure time (allow at least 24 to 48 hours before tiling).
- Tiling walls and floor (3 to 7 days depending on size and pattern).
- Fixture installation: toilet, vanity, shower enclosure, taps.
- Finishing touches: trim, mirrors, lighting, final caulking.
- Final walkthrough and punch list.
Delays cluster around three points: custom fixture deliveries, membrane cure times that get rushed to hit a deadline, and inspection scheduling that doesn’t align with your contractor’s calendar. Build a week of slack into the middle of the schedule, not the end, and tie payment milestones to completed stages rather than calendar dates.
Vetting Contractors: What Every Quote and Contract Should Include
A complete written quote spells out scope, exclusions, material allowances, and who is responsible for pulling permits. If a quote is missing any of those four items, ask for a revision before you sign anything.
- Confirm public liability insurance and ask for proof, not just a verbal assurance.
- Ask for two or three references from bathroom-specific jobs completed in the last year.
- Request itemized allowances for tile, fixtures, and fittings, not a single lump sum.
- Get the change-order process in writing before work starts, not after a surprise turns up.
Pro Tip: Ask each bidder the same five questions in the same order. It’s the only way to compare quotes fairly instead of comparing sales pitches. When demolition uncovers hidden rot or outdated wiring, a documented change-order process that spells out the finding, the fix, and the cost impact keeps a genuine surprise from turning into a dispute.
Choosing Materials That Survive a Wet Room
Order long-lead items the moment selections are final. Vanities, shower glass, and specialty tile routinely set the finish date more than the labor does, since custom pieces can run four to eight weeks out.
- Order custom vanities, shower enclosures, and specialty tile as soon as you sign off on the design.
- Choose slip-resistant flooring rated for wet areas, not standard ceramic meant for dry rooms.
- Specify corrosion-resistant fittings, especially in hard water areas.
- Keep a written log of every model number, finish code, and warranty period for your job file.
Waterproofing systems belong on this list too, not just visible finishes. A membrane that fails costs far more to fix later than the few extra pounds it costs to spec properly up front, a point covered in more detail in our shower wall waterproofing guide.
Waterproofing and Ventilation Checks While Work Is Underway
Waterproofing is the step where corners get cut and leaks get born. The membrane needs to cover every wet zone completely, transitions and pipe penetrations need to be sealed and detailed, and the whole system needs to cure fully before a single tile goes down. Poor waterproofing is consistently flagged as the leading cause of hidden water damage in bathroom remodels, and it’s almost always invisible until the damage has already spread behind the wall.
Ventilation matters just as much and gets skipped just as often. Extractor fans need to vent outside the building envelope, never into a loft or wall cavity, where trapped moisture causes rot and damp over time, according to guidance from Cloudy2Clear Windows on home ventilation.
- Request photos of the membrane before it’s covered by tile.
- Ask for a water test on the shower pan or wet room floor before grouting.
- Confirm the fan’s extraction rate matches the room’s size.
- Verify the vent terminates outside, with a signed checkpoint before close-up.
Final Punch List and Job File Before You Pay the Last Invoice
Walk the finished bathroom with a checklist in hand, not just an eye for how it looks.
- Run every tap and flush the toilet twice, checking for leaks at joints.
- Check that grout lines and caulking are continuous with no gaps.
- Test the extractor fan and confirm it clears steam within a few minutes.
- Confirm fixtures are level and doors or shower screens close cleanly.
- Collect the contract, change orders, warranties, and inspection certificates into one job file.
Keep that file somewhere you’ll find it in five years, since warranty claims and resale disclosures both depend on it, a habit backed by RenoSheets’ handover guidance. Hold back a small percentage of final payment until any snag list items are resolved, not just promised.
Waste Disposal and Demolition Planning
Demolition generates more waste than most homeowners expect: old tile, a cast iron tub, torn-out drywall, and plumbing fixtures add up fast, and none of it fits in a household bin. Plan disposal before the sledgehammers come out, not after your driveway is buried in debris.
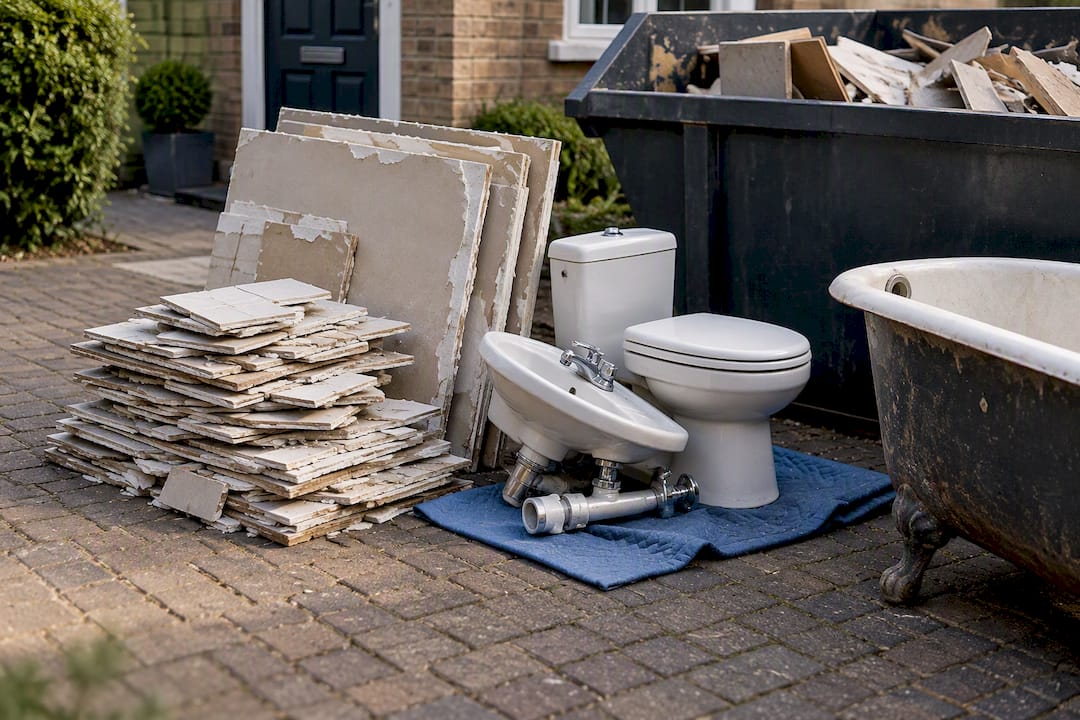
Ask your contractor whether waste removal is included in the quote or billed separately. Some crews include skip hire and disposal fees in their price; others expect you to arrange a skip or licensed waste carrier yourself. Either way, get it in writing, because unplanned skip rental mid-project tends to cost more than booking it in advance.
A few practical points worth settling before day one:
- Confirm who’s responsible for booking a skip and where it will sit without blocking access or violating any local permit requirements for street placement.
- Separate recyclable materials, like metal pipework and certain tile types, where your local waste facility accepts them.
- Ask how the crew handles asbestos risk in older homes, since textured ceilings, old flooring adhesive, and pre-1980s pipe lagging sometimes contain it and require licensed removal rather than a standard skip.
- Clarify the demolition timeline so waste doesn’t sit in the house for days, which is both a hazard and an inconvenience if you’re living in the property during the work.
None of this is exciting to plan, but it’s the part of the project that turns into a headache fastest when nobody owns it. A five-minute conversation with your contractor before demolition starts saves a week of confusion later.
A Contractor’s View on Where Bathroom Jobs Actually Go Wrong
Most derailed bathroom projects don’t fail because of bad tile choices. They fail because scope wasn’t locked before work started, or because waterproofing got rushed to hit a deadline. The fix for both is the same: a written scope everyone agrees to, and a sequence that never lets finishes get ahead of the hidden systems underneath them.
When demolition uncovers rot behind an old tub surround, the right move isn’t to panic or hide it. It’s a documented change order: what was found, what fixing it costs, and how it shifts the schedule. Homeowners who ask for that in writing get fewer surprises and fairer prices.
— James
Let Jmplumbingservicesltd Handle the Checklist for You
Jmplumbingservicesltd runs bathroom renovations as one accountable local team in Cardiff and the Vale of Glamorgan, not a patchwork of subcontractors passing blame between each other. That means the scope, the permit handling, and the waterproofing checkpoints covered in this checklist are managed by the same crew from first measurement to final punch list, backed by fixed pricing and no showroom markup.

A full bathroom renovation in Cardiff runs £2,500 to £4,000 one-off, with a written scope agreed before any demolition starts. If you’d rather focus on fitting and installation specifically, the team also offers dedicated bathroom fitting services across the area, along with tiling and wet room conversions. Every job, big or small, gets the same attention and a warranty on the finished work.
Ready to see what your project would actually cost? Request a quote through the Bathroom Renovation Cardiff page and get a written scope back before you commit to anything.
Where This Checklist Comes From
This guide draws on official building-regs guidance, trade cost data, and established remodel checklists used across the industry.
Sources
FAQ
In What Order Should You Do a Bathroom Renovation?
Start with scope and budget, then measure and confirm permits, then move through demolition, rough-in, waterproofing, tiling, fixtures, and finishes before a final punch list. Skipping ahead to finishes before waterproofing is verified is the most common sequencing mistake, according to This Old House’s checklist guidance.
What Are Common Mistakes to Avoid When Renovating a Bathroom?
The biggest mistakes are starting without a locked scope, skimping on waterproofing to save time, and failing to confirm which permits apply before demolition. Rushing membrane cure times before tiling is a close fourth, since it’s invisible until a leak shows up months later.
What Is a Realistic Budget for a Bathroom Renovation?
A full bathroom renovation through Jmplumbingservicesltd in Cardiff and the Vale of Glamorgan runs £2,500 to £4,000 one-off, depending on size and scope. Set your figure with a 10 to 15 percent contingency built in, since hidden plumbing or wiring issues are common once demolition starts.
What Should I Include in My Bathroom Remodel Checklist?
Your checklist should cover scope definition, an all-in budget with contingency, measurements and service locations, permit confirmation, long-lead material orders, written contractor quotes, a realistic timeline, waterproofing verification, required inspections, and a final punch list. Each item ties to a specific point in the sequence, not a random order.