
Toilet Base Leaks: 3 Quick Tests, No Lifting Required for UK Homes
Three quick no lift tests to find the cause of your toilet base leak. Step by step DIY fixes and clear signs for when to call a plumber.
Toilet Base Leaks: 3 Quick Tests, No Lifting Required for UK Homes
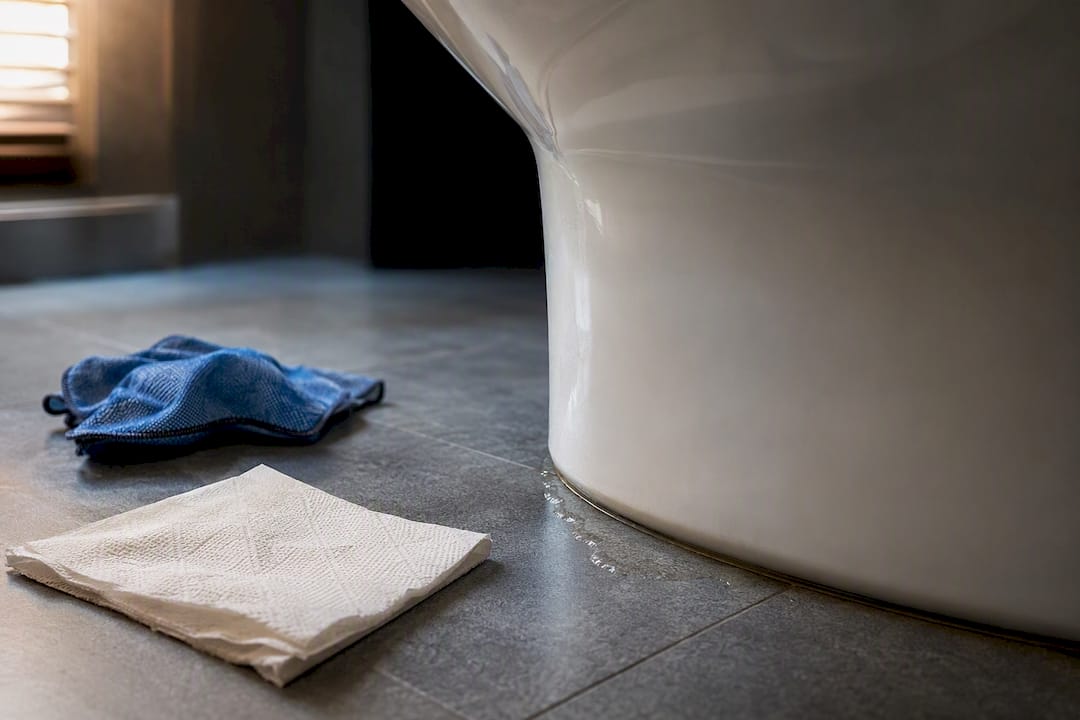
If you see water pooling around the toilet base after flushing, the most likely cause is a failed wax ring or a bad pan connector. A loose closet bolt, a leaking supply line, or a worn tank-to-bowl gasket are close runners-up. Shut off the isolation valve if the puddle is spreading, mop the area dry, and work through the quick checks below before you touch a wrench.
TL;DR:
- Most toilet base leaks are caused by a failed wax ring, especially if water appears only after flushing, but supply line and gasket issues can also be responsible.
- Conducting quick tests, like a dye test and a dry-and-wait check, can identify the cause without removing the toilet and save time and money.
- Tightening bolts or replacing the supply line often resolves minor leaks if detected early, but more invasive repairs are needed if the flange or pan is damaged.
- A wobbling toilet indicates a seal or bolt failure, which should be checked carefully to avoid cracking the porcelain during over-tightening.
- Professional inspection is advised for recurring leaks or structural damage, as improper repairs can lead to repeated failures and higher costs.
Table of Contents
- Quick Checklist: Match Your Symptoms to the Likely Cause
- Step-by-Step Quick Checks You Can Run Now
- Repair Options, From Simple Fixes to Bigger Jobs
- When a Leaking Toilet Base Needs a Professional
- Keeping Your Toilet Base Leak-Free Going Forward
- Why This Diagnosis Matters More Than the Fix Itself
- The Diagnostic Order Most Guides Get Backwards
- Get a Professional Diagnosis From Jmplumbingservicesltd
- Sources
- FAQ
Quick Checklist: Match Your Symptoms to the Likely Cause
Before you buy parts or call anyone, match what you’re seeing to the pattern below. Getting this right the first time saves you from replacing a $12 washer when the real problem is a $20 wax ring three feet away.
- Water only appears right after flushing: This points to the wax ring, the pan connector, or the tank spud gasket. Flushing sends a surge of water through the seal, and a compromised one lets it escape at that exact moment.
- A slow, steady drip regardless of flushing: Look at the supply connector, the rubber washer inside it, or the isolation valve itself. These leaks tend to be constant rather than triggered by use.
- Moisture collecting under the tank or trickling down the back of the bowl: This is almost always the tank-to-bowl gasket (also called the spud gasket on close-coupled toilets) or bolts that have worked loose over time.
- Even droplets across the porcelain with no obvious source: That’s condensation, not a leak. It happens when a cold cistern meets warm, humid bathroom air, and it’s a maintenance issue, not a plumbing failure.
Before assuming the worst, run three simple tests: dry the base completely and wait 15 minutes without using the toilet, drop food coloring into the tank and check the floor after half an hour without flushing, and physically feel around the supply nut and cistern bolts for wetness. These three checks alone usually point straight to the culprit.
Step-by-Step Quick Checks You Can Run Now
You don’t need to remove the toilet to figure out what’s going on. Work through these in order:
- Find the isolation valve behind or beside the toilet and turn it clockwise to shut off the water supply.
- Watch whether the leak stops. If it does, the problem is upstream of the bowl. If puddling continues even with the water off, you’re likely dealing with residual water trapped under the base or condensation.
- Run the dye test. Add a few drops of food coloring to the cistern, wait 30 to 60 minutes without flushing, and check the floor around the base for tinted water. Color at the base points to a tank-to-bowl or supply issue rather than the wax ring, since the ring only gets tested during an actual flush.
- Dry the base fully, then flush once and time how quickly moisture reappears and exactly where. Water at the front usually means the pan connector or wax ring; water at the back often means the gasket or bolts.
- Check the supply nut, valve spindle, and cistern bolts for beads of water forming during or after the flush.
- Gently rock the toilet side to side with your hand on the seat. Movement usually means the seal underneath has already failed or the closet bolts have loosened.
Pro Tip: Never crank down on a wobbly toilet to stop the rocking before you’ve checked what’s causing it. Overtightening a closet bolt on a cracked or shifted pan can snap the porcelain around the bolt hole, turning a $15 fix into a full toilet replacement.
Repair Options, From Simple Fixes to Bigger Jobs
Work through these roughly in order of how invasive they are. Most homeowners never need to go past the first two.
Tighten bolts and swap the supply line first. If the rock test showed slight movement or you spotted a drip at the supply nut, start here. Tighten the closet bolts evenly, a little at a time on each side, rather than cranking one side down hard. Swap a worn braided supply hose or its washer if that’s where moisture is forming. This takes 20 to 30 minutes with a basic wrench and screwdriver, and parts run just a few dollars. Replacing the flexible connector usually solves supply-line drips outright, and plumbers generally recommend replacing these hoses every 3 to 5 years regardless of whether they’ve started leaking.
Replace the tank-to-bowl gasket if water is showing up under the tank. This job runs about £8 to £15 in parts and takes 30 to 45 minutes. You’ll disconnect the supply line, remove the tank bolts, lift the tank off, and swap the rubber spud gasket sitting between tank and bowl before reassembling.
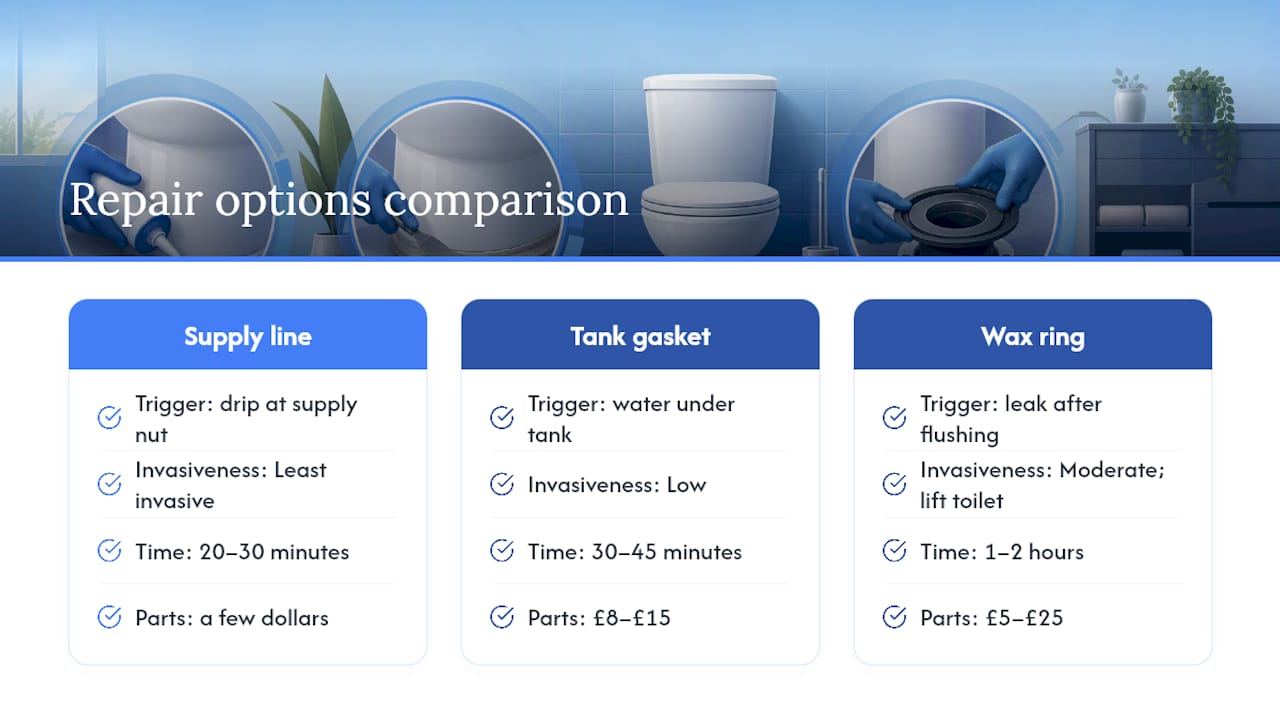
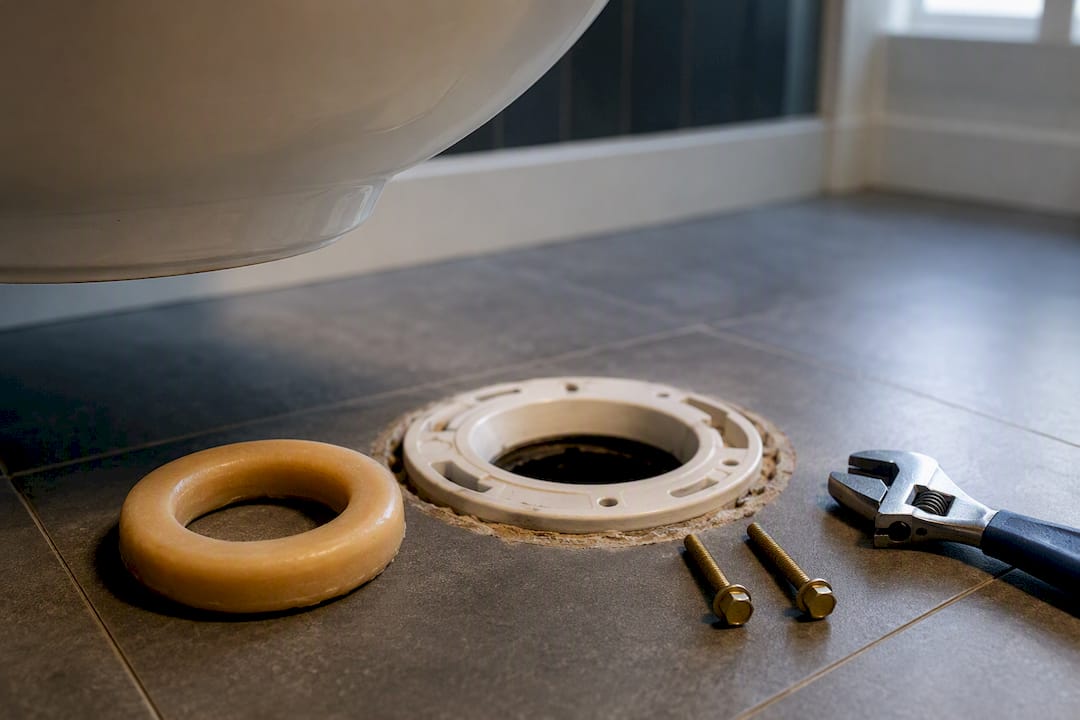
Reseat or replace the wax ring if the leak shows up specifically after flushing. This is the single most common cause of a leaking toilet base, and it’s a real DIY job for anyone comfortable with basic tools. Shut off and drain the tank and bowl, disconnect the supply line, remove the closet bolts, and lift the toilet straight up rather than tipping it, since toilets typically weigh 50 to 100 pounds and tipping can crack the base or stress the flange underneath. Inspect the flange and subfloor for damage, install a new wax ring or a wax-free rubber alternative, and lower the bowl back down without rocking it. Tighten the new bolts evenly. Parts cost roughly £5 to £25, and the whole job usually takes 1 to 2 hours. If the flange sits below the finished floor line, which happens often after new flooring goes in, you’ll need a flange extender or a thicker wax ring to bridge the gap properly.
Replace the pan connector if the leak is at the rear of the pan and the toilet ties into a soil pipe rather than a wax seal setup. Pan connector failures are typically caused by perished rubber, a misaligned pan, or slight shifting over the years. Measure the new connector against the old one, clean the soil pipe thoroughly, seat the connector, and realign the pan carefully; even a few millimeters of misalignment can stop it from sealing. This job runs 1 to 2 hours for a straightforward swap.
Stop and call a professional if the pan itself is cracked or the flange is corroded and recessed; see toilet base leaking: causes, fixes, and when to call a plumber for expert guidance. No amount of new wax or connector fixes a broken base, and forcing a repair onto damaged pipework usually just relocates the leak.
When a Leaking Toilet Base Needs a Professional
Some signs mean you should put the tools down. A soft or spongy patch of flooring, damp spreading beyond the toilet footprint, or a stain showing up on the ceiling below the bathroom all point to structural water damage that needs more than a new seal.
- Cracked pan or a corroded, recessed flange: These need replacement parts and sometimes minor pipework, not a fresh wax ring.
- The leak returns after you’ve already reseated the pan once: Something else is wrong, most likely the flange height or subfloor condition underneath.
- Spongy or discolored flooring: This signals rot that’s already progressed past a surface fix.
A plumber visiting for this kind of job typically inspects the flange and subfloor, replaces the connector or flange as needed, and repairs any affected joists before resetting the toilet. Costs for a professional wax ring or connector repair commonly run £200 to £400 depending on scope, with subfloor or joist repair pushing that higher.
Keeping Your Toilet Base Leak-Free Going Forward
A few minutes of maintenance each year beats another afternoon pulling up a toilet. Check the closet bolts annually and swap any that have loosened, using non-compressible shims if the bowl isn’t sitting flat against the floor. Replace supply hoses every 3 to 5 years or sooner if you spot corrosion, and glance at the isolation valve occasionally for weeping around the spindle.
- Tighten bolts alternately and snugly, never forcefully. Cranking one side down hard is how porcelain cracks around the bolt hole.
- Improve bathroom ventilation or fit an anti-sweat valve or tank liner if condensation keeps forming on the cistern.
- Caulk the front and sides for a finished look, but leave the back of the base uncaulked. That gap is your early warning system: a future wax-ring failure will show up as visible water instead of quietly wicking into the subfloor for weeks.
Pro Tip: Skip sealant or tape as a “temporary fix” for a leak at the base. It almost always fails within a few weeks and can hide a growing problem behind a dry-looking bead of caulk while water keeps working into the floor underneath.
Why This Diagnosis Matters More Than the Fix Itself
Professional plumbing services handle bathroom repairs and full renovations, and base leaks are a common service call. Most turn out to be a wax ring or pan connector, but a fair number involve homes where new flooring or an old subfloor repair left the flange sitting at the wrong height. Technicians should check flange condition and subfloor integrity before recommending a repair versus a full reset, because guessing wrong on a flange problem can mean doing the job twice. Readers weighing a DIY attempt against calling someone can see what to do about a bathroom leak for a closer look at how these visits typically go.
The Diagnostic Order Most Guides Get Backwards
Most advice on a leaking toilet base jumps straight to “replace the wax ring” because it’s the most common cause. That’s true, but it skips a step that actually saves people time: rule out condensation and the supply line first, because they take five minutes to check and need zero tools beyond a paper towel and some food coloring.
The bigger mistake I see homeowners make is treating a wobble as cosmetic. A rocking toilet isn’t a minor annoyance. It’s usually a seal that’s already failing, and every flush after that point pushes more water past a ring that was only ever designed to sit still. Tightening the bolts without asking why they loosened just delays the real fix.
If there’s one thing worth prioritizing, it’s speed of diagnosis over speed of repair. A five minute dye test tells you whether you’re about to spend $15 or two hours, and whether the job is even one you should attempt yourself. Skip that step, and you’re just guessing with a wrench in hand.
— James
Get a Professional Diagnosis From Jmplumbingservicesltd
If the dye test, the dry-and-wait check, and a look at the flange still leave you unsure what’s actually failing, that’s exactly the gap Jmplumbingservicesltd closes for homeowners in Cardiff and the Vale of Glamorgan. Rather than a repeat callout for a leak that keeps coming back, a thorough inspection of the flange, subfloor, and connector on the first visit can identify and fix the actual cause, not just the symptom.

That matters most when a “simple” wax ring swap turns out to be a flange sitting below the floor line or early subfloor rot, the kind of problem a rushed fix won’t solve twice. Some service providers also handle renovations, so if a leak has damaged flooring or you’re ready to upgrade the whole bathroom while the toilet is out, a single coordinated visit may be possible instead of two separate jobs. Get a plumber in Cardiff out to check the base properly, or start with the Cardiff bathroom installation team if you’re already thinking about a bigger refresh.
Sources
- How to Fix a Leaking Toilet Base: Diagnose and Repair (WaterClue)
- Toilet leaking at base | The Plumbing Directory
- How to Fix a Leaking Toilet (Oatey)
FAQ
How Do I Stop My Toilet From Leaking at the Base?
Shut off the isolation valve first, then identify the cause with a dye test and a dry-and-wait check. Most base leaks trace back to a failed wax ring or pan connector, and replacing that specific part, rather than caulking over the symptom, is what actually stops it.
Is a Toilet Leaking at the Base an Emergency?
It depends on the volume and location. A slow leak after flushing usually isn’t urgent if you shut off the water and dry the area, but spreading damp, ceiling stains, or a soft floor mean you should stop and call a plumber right away.
What Does It Mean if Your Toilet Is Leaking From the Base?
It typically means one of four things has failed: the wax ring under the bowl, the pan connector, the tank-to-bowl gasket, or a supply line fitting. Condensation can mimic a leak but shows up as even droplets rather than pooling.
Can I Still Use My Toilet if It’s Leaking at the Base?
You can usually keep using it for a short time if the leak is minor and you’re actively working on a fix, but every flush pushes more water through a failing seal. Continued use on a cracked pan or badly corroded flange risks further damage, so get it repaired as soon as you reasonably can.